
RV Hatch Trailer Life Magazine

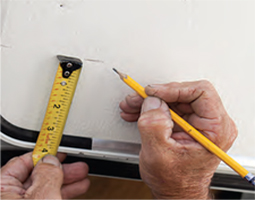
1. Measure 4 inches from the top edge of the door for the leading edge of the mounting plate.
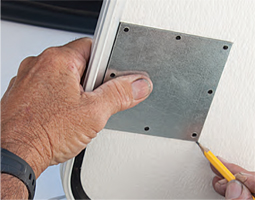
2. With the mounting plate held into position, pencil a line around the outside edge.
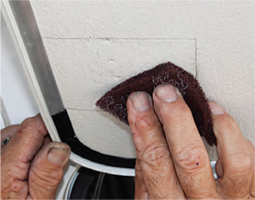
3. Using the scuff pad, rough up the outlined area for the first step of prep.
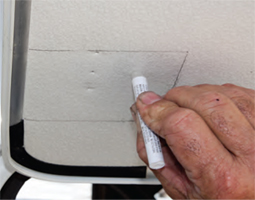
4. Next, follow the instructions provided and apply the primer to the scuffed, prepped area.
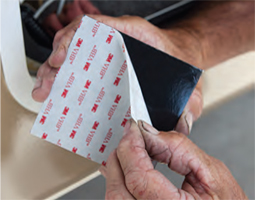
5. Peel off the protective film on the mounting plate.
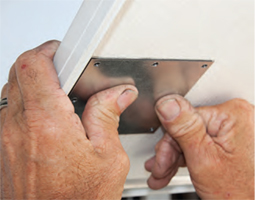
6. Align the plate carefully, press and hold into place.
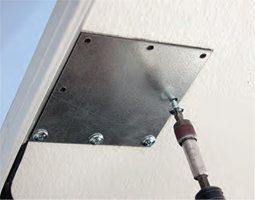
7. Using the provided self-tapping screws, drive the screws into place but do not tighten with a drill motor; you should hand tighten with a screwdriver to avoid stripping the screws or overtightening.
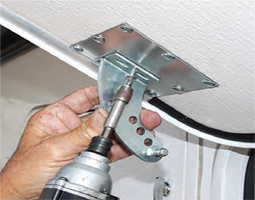
8. Install the upper bracket centered 6 inches from the top of the door.
.jpg)
9. Remove and install the shock stud into one of four adjustment holes.
.jpg)
10. Install the lower bracket at the pre-determined position using the supplied self-tapping screws.
.jpg)
11. Remove the center screw from one of the baggage door locks and install the pull strap with the supplied screw.
|
We recommend that you hold the gas prop assembly in place once again to be certain it has complete clearance, top and bottom. Using the supplied pad, scuff the area where the plate is to be mounted, then clean it with rubbing alcohol and allow it to dry. The next step is to crush the tube of primer at the small black dot and apply the entire contents to the location of the scuffed, prepped area. It takes about 10 minutes for the primer to completely dry. The exact placement of the mounting plate is critical, as you will only have one chance for proper installation. Hold the plate firmly against the door for a full minute. The next step is to install the 1/2-inch self-tapping screws through the mounting plate’s predrilled holes. Be sure to hand tighten only. The screws help hold the plate in position while the adhesives cure over the requisite 48-72 hours. Once that’s done, it’s time to install the curved mounting bracket, predrilling the mounting plate with a 1/8-inch drill bit, which is not included. Then, attach the gas prop to the upper and lower brackets, being certain both ends are engaged firmly on the ball studs. To be sure the newly installed Hatchlift is working properly, open and close the baggage door only once or twice. |
Then remove the gas prop and allow the Hatchlift mounting plate to fully cure without being under a load. If needed, install the hatch strap to the backside of the baggage door lock with the provided screw. In some cases you may need to install shims, blocks or alternate brackets to best accommodate the lower bracket location. The installation of the first Hatchlift spring assembly to a baggage door takes about an hour, but once you’ve become familiar with the process, installation time will reduce by about 15 minutes. A second mounting stud is included with the kit so that the doors will operate under slideouts. Also, the aforementioned shims are now part of the kit, as are alcohol wipes for cleaning the door face. Hatchlift carries a 12-month warranty and an MSRP ranging from $31.95 to $41.95, depending on the size of the door. FOR MORE INFORMATION |