Hatchlift Kit Installation Instructions
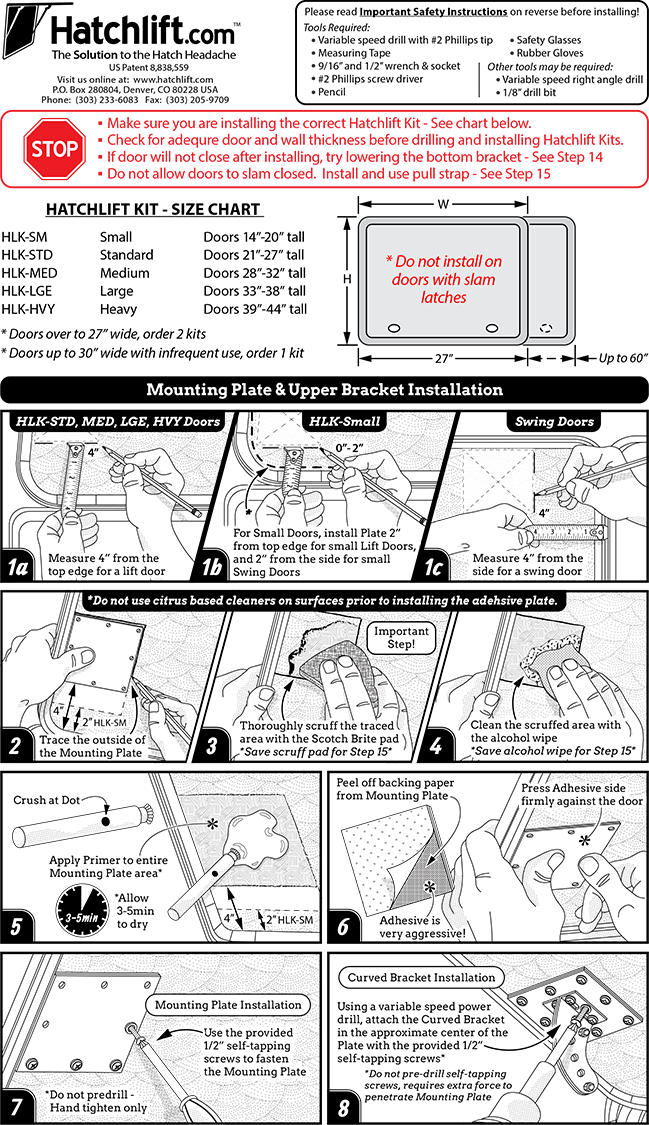
Install the Hatchlift kit when temperatures are above 50 degrees. If possible, work with a helper. A variable speed drill is HIGHLY recommended. Self tapping screws can strip if over tightened. When attaching the mounting plate, hand tighten the screws.
The mounting plate location can be moved closer or further in from the top and edge of the door to accommodate proper door swing. If the plate location is moved, check the door's operation before installing.The spring can install on either side of the curved bracket by turning the ball around.
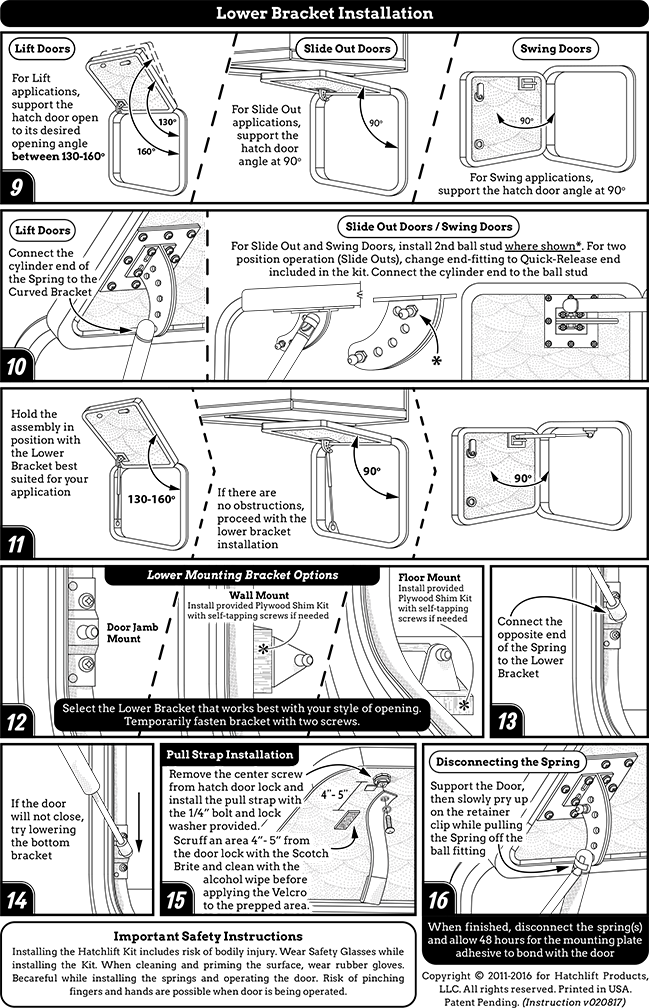
If installing Hatchlift Kits on both sides of a door, upper and lower brackets must be installed in the approximate same location on the both sides of the door. The cylinder end of spring installs on the curved bracket, pointed down when closed.
When finished with the installation, disconnect springs and allow 48 hours for the mounting plate to finish adhering to the door. When not in use or in storage, disconnect springs.
Please read Important Safety Instructionson reverse before installing! Tools Required
|


Warranty: Hatchlift, LLC warrants to buyer for a period of 12 months from the date of purchase that the Hatchlift product will be free from defects in material and workmanship. If within the warranty period, the product is found to be defective, Hatchlift’s sole obligation will be to replace the defective product at its option and expense excluding freight charges. Hatchlift, LLC does not warrant any products, accessories, or components not manufactured by Hatchlift, LLC but to the extent possible agrees to provide Buyer with the benefits of the manufacturer warranty, if any. Hatchlift, LLC shall not be liable for any damage to or wear of products caused in whole or part by abnormal conditions, improper application / installation, Hatchlift modification, use, or other causes external to the Hatchlift product.
